Installing certificates of the 3 RTE’s CAs
The certificates of the 3 RTE’s CAs (Historical, Root and Client) must first be installed for Thunderbird to be able to verify the signature of emails sent by RTE.
IMPORTANT NOTE
It is imperative to respect the case (upper / lower case) of the following websites’ addresses.
RTE Historical Certification Authority
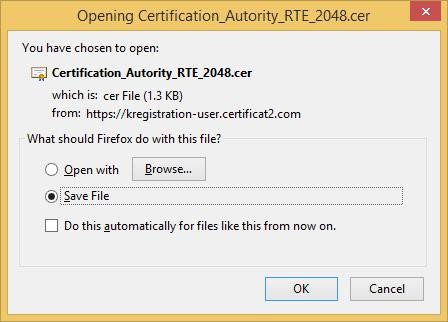
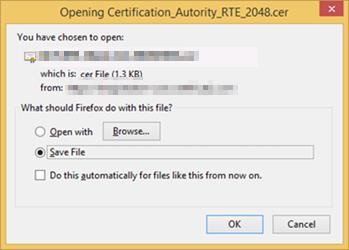
With your web browser go to the address below to download the file "
Certification_Autority_RTE_2048.cer" containing RTE Historical CA certificate:
Click the "
Save" button and choose a location to save the file "
Certification_Autority_RTE_2048.cer"
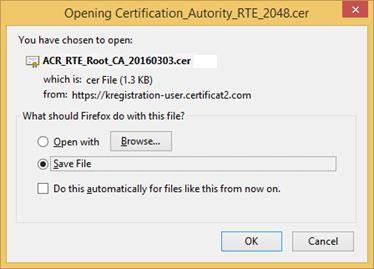
Select "
Save file" then click "
OK". A location to save the file
"
Certification_Autority_RTE_2048.cer" will eventually be requested.
The certificate you just downloaded must be installed in Thunderbird certificate store.
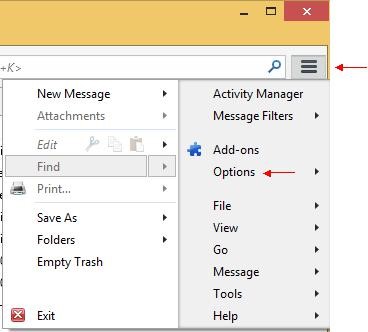
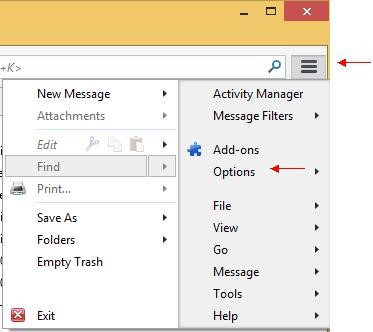
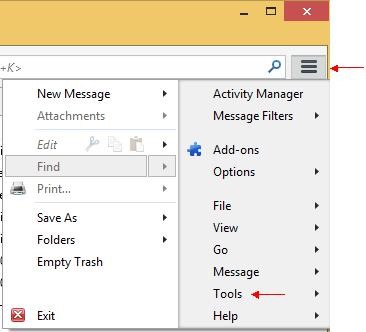
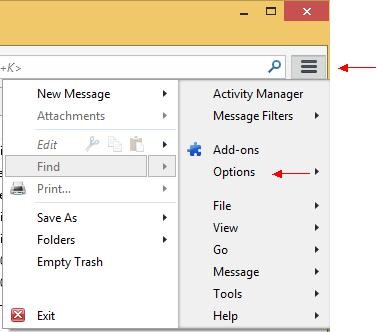
In the menu "
Tools" on the top right of the window click "
Options":
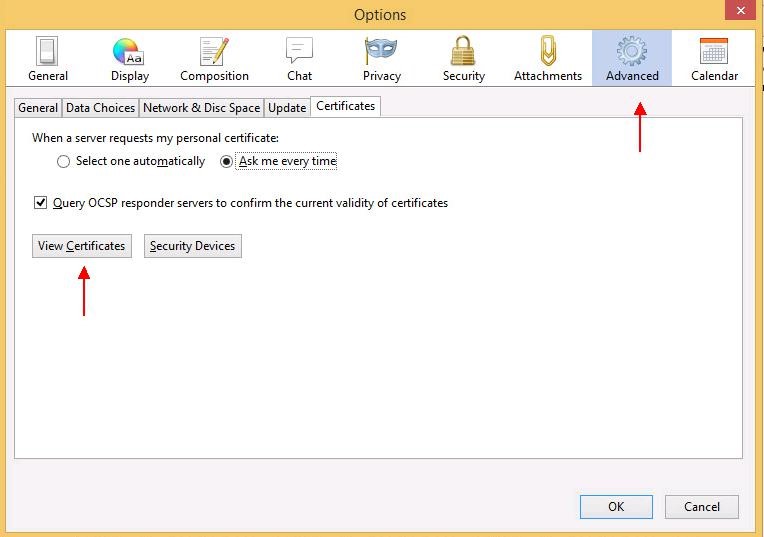
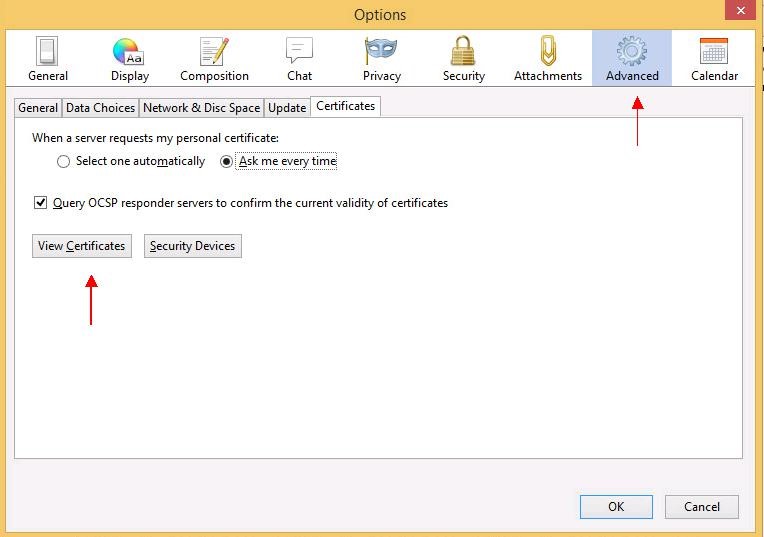
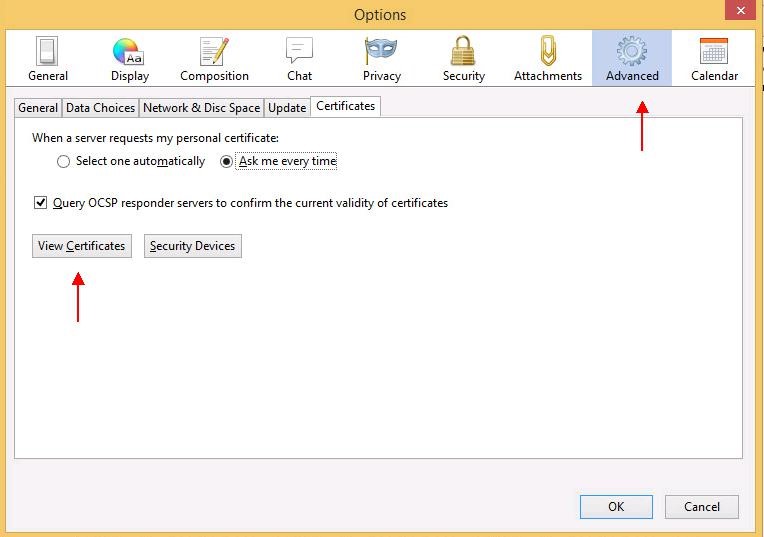
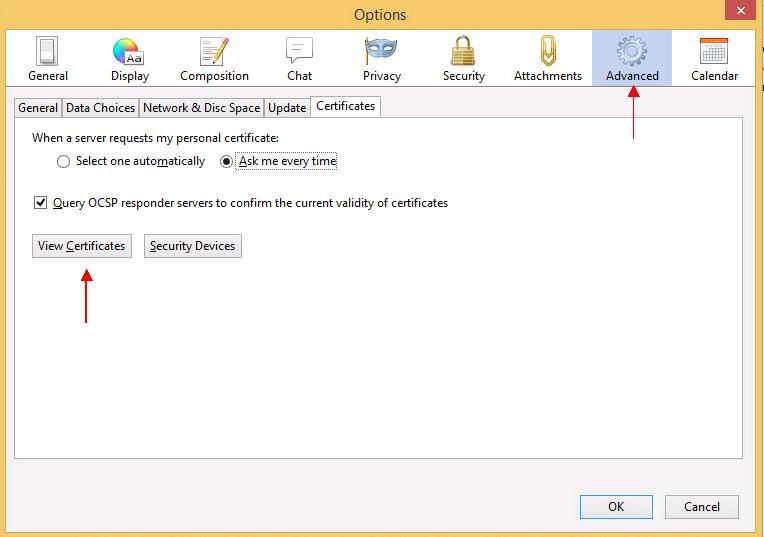
A window appears. Choose the "
Advanced" tab then the "
Certificates" subcategory.
Click the button "
View Certificates".
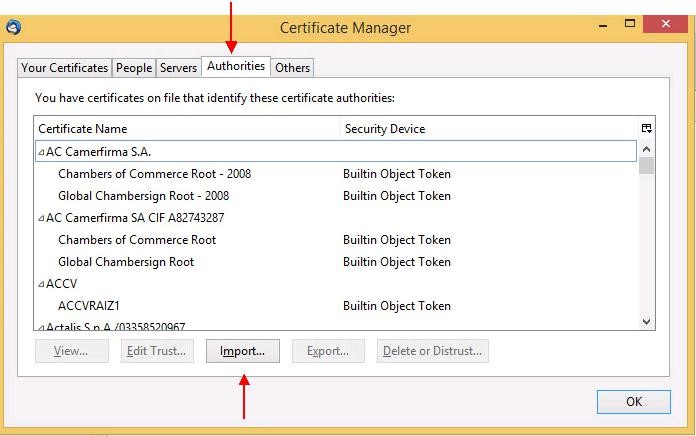
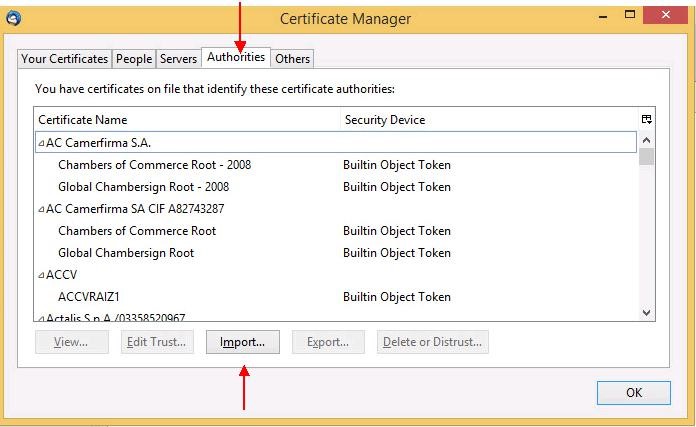
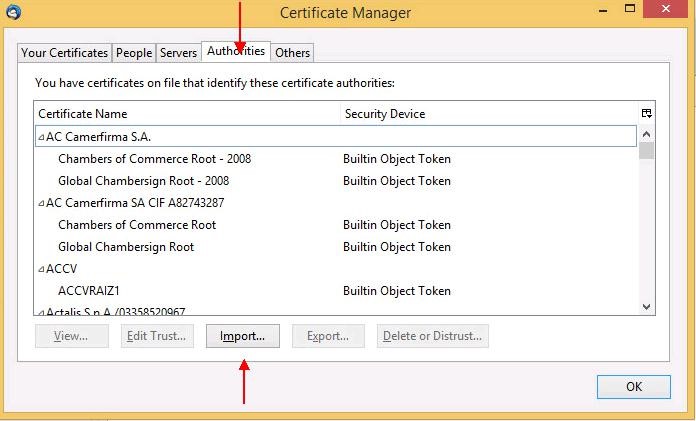
Select the "
Authorities" tab and click "
Import…".
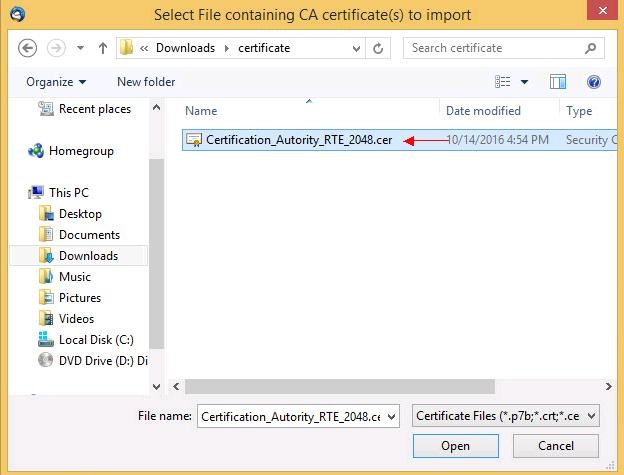
Select the previously saved file "
Certification_Autority_RTE_2048.cer" and click "
Open".
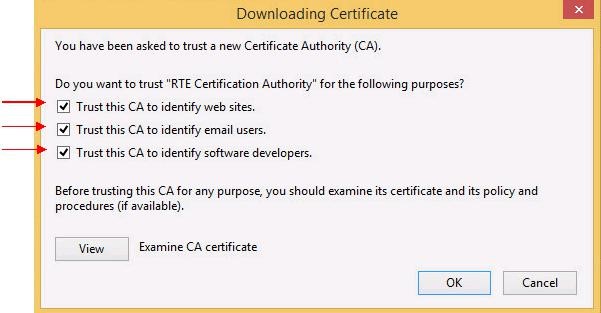
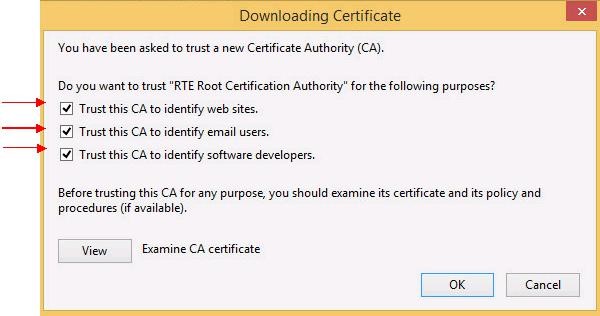
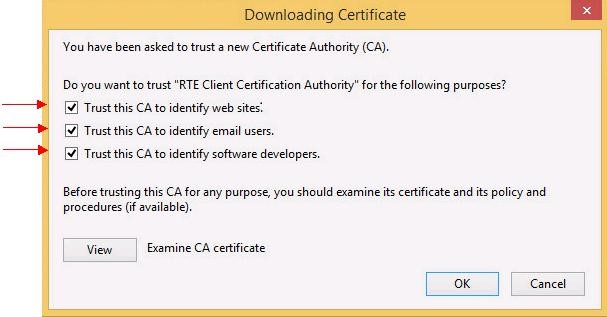
A dialog box is displayed, in which you must select the three check boxes "
Trust this CA to identify [...]" to trust RTE Historical CA.
Click the "
View" button to verify that the certificate that you are going to trust is the certificate of RTE Historical CA:
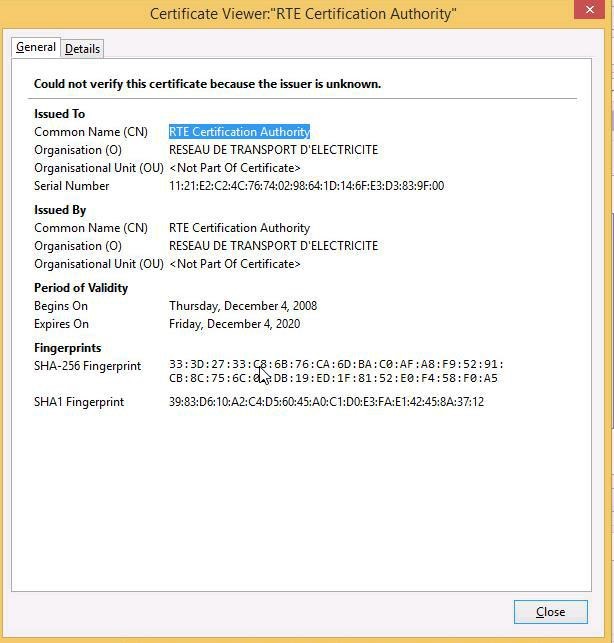
To ensure that you have downloaded the real RTE Historical CA's certificate, check carefully that the "
SHA1" hash displayed is identical to the one shown below.
Digital hash of the certificate "RTE Certification Authority"
SHA1 39:83:D6:10:A2:C4:D5:60:45:A0:C1:D0:E3:FA:E1:42:45:8A:37:12
If this is not the case: click "
Close" to go back to the precedent window and click "
Cancel" then call RTE’s Hotline (
here).
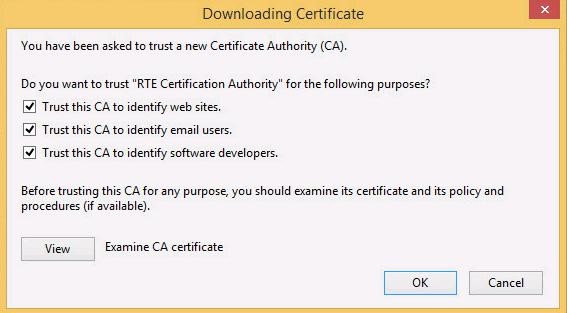
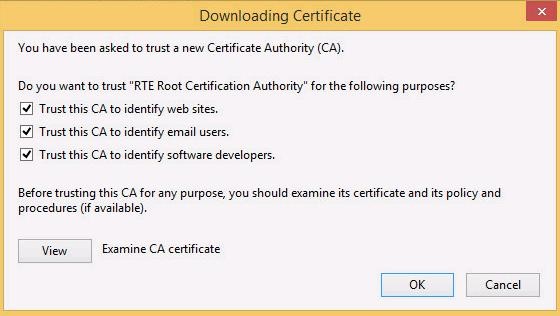
If this is the case, click "
Close" to return to the initial window: "
Downloading certificate":
Click the "
OK" button: RTE Historical CA's certificate is then installed.
Téléchargement et installation du certificat de l’AC Root RTE
With your web browser go to the address below to download the file "
ACR_RTE_Root_CA_20160303.cer" containing
RTE Root CA certificate:
Click the "
Save" button and choose a location to save the file "
Certification_Autority_RTE_2048.cer"
Select "
Save file", then click "
OK". A location to save the file
"
ACR_RTE_Root_CA_20160303.cer" will eventually be requested.
The certificate you just downloaded must be installed in Thunderbird certificate store.
In the menu "
Tools" on the top right of the window click "
Options":
A window appears. Choose the "
Advanced" tab then the "
Certificates" subcategory.
Click the button "
View certificates".
Select the "
Autorities" tab and click "
Import…".
Select the previously saved file "
ACR_RTE_Root_CA_20160303.cer" and click "
Open".
A dialog box is displayed, in which you must select the three check boxes "
Trust this CA to identify [...]" to trust RTE Root CA.
Click the "
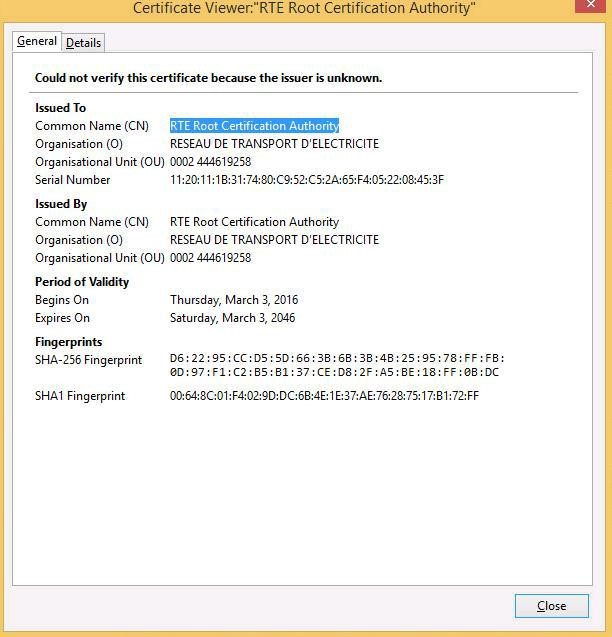
View" button to verify that the certificate that you are going to trust is the certificate of RTE Root CA:
To ensure that you have downloaded the real RTE Root CA's certificate, check carefully that the "
SHA1" hash displayed is identical to the one shown below.
Digital hash of the certificate "RTE Root Certification Authority" SHA1
SHA1 00:64:8c:01:f4:02:9d:dc:6b:4e:1e:37:ae:76:28:75:17:b1:72:ff
If this is not the case: click "
Close" to go back to the precedent window and click "
Cancel" then call RTE’s Hotline (
voir ici).
If this is the case, click "
Close" to return to the initial window "
Downloading certificate":
Click the "
OK" button: RTE Root CA's certificate is then installed.
RTE Client Certification Authority
With your web browser go to the address below to download the file "
ACF_RTE_Client_CA_20160303.cer" containing RTE Client CA certificate:
Click the "
Save" button and choose a location to save the file "
ACF_RTE_Client_CA_20160303.cer"
Select "
Save file" then click "
OK". A location to save the file
"
ACF_RTE_Client_CA_20160303.cer" will eventually be requested.
The certificate you just downloaded must be installed in Thunderbird certificate store.
In the menu "
Tools" on the top right of the window click "
Options":
A window appears. Choose the "
Advanced" tab then the "
Certificates" subcategory.
Click the button "
View Certificates".
Select the "
Autorities" tab and click "
Import…".
Select the previously saved file "
ACF_RTE_Client_CA_20160303.cer" and click "
Open".
A dialog box is displayed, in which you must select the three check boxes "
Trust this CA to identify [...]" to trust RTE Client CA.
Click the "
View" button to verify that the certificate that you are going to trust is the certificate of RTE Client CA.
To ensure that you have downloaded the real RTE Client CA's certificate, check carefully that the "
SHA1" hash displayed is identical to the one shown below.
Digital hash of the certificate "RTE Client Certification Authority" SHA1
SHA1 C8:53:de:36:da:fd:38:37:c3:de:a5:6c:b0:d1:eb:06:28:f6:dc:ed
If this is not the case: click "
Close" to go back to the precedent window and click "
Cancel" then call RTE’s Hotline (
here).
If this is the case, click "
Close" to return to the initial window: "
Downloading certificate":
Click the "
OK" button: RTE Client CA's certificate is then installed.
Visualization of RTE CAs certificates
To view the CAs certificates later in Mozilla Thunderbird, go to the "
Tools" menu on the top right of the window then click the "
Options" icon:
A window appears. Select the "
Advanced" tab then the subcategory "
Certificates".
Click the "
View Certificates" button.
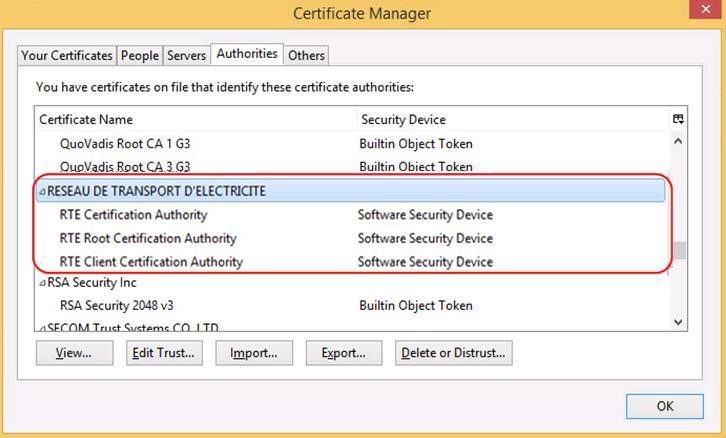
In "
Authorities" tab, you can verify that the certificates "
RTE Certification Authority", "
RTE Root Certification Authority", "
RTE Client Certification Authority" you import are registered in Thunderbird ("
Software Security Device"). You can see the content of each certificate by clicking on the certificate and then clicking on "
View".
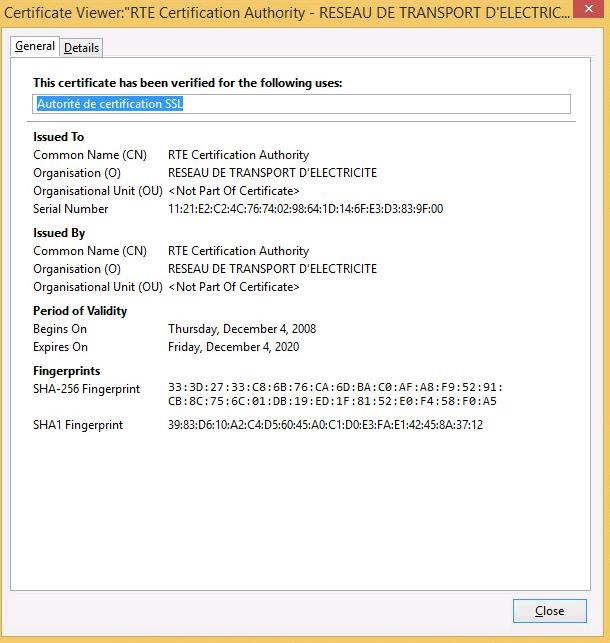
Select "
RTE Certification Authority" and click "
View":
To ensure that you have downloaded the real RTE Historical CA's certificate, check carefully that the "
SHA1" hash displayed is identical to the one shown below.
Digital hash of the certificate "RTE Certification Authority" SHA1
SHA1 39:83:D6:10:A2:C4:D5:60:45:A0:C1:D0:E3:FA:E1:42:45:8A:37:12
If this is not the case: click "
Close" to go back to the precedent window and call RTE’s Hotline (
voir ici).
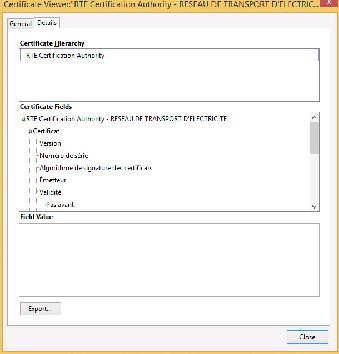
If, after verification, the hash of the certificate that you imported matches the "
SHA1" hash above, it is possible to consult the details of the certificate by clicking on the "
Details" tab:
By clicking on the "
Close" button, you return to the initial window.
Select "
RTE Root Certification Authority" and click "
View":
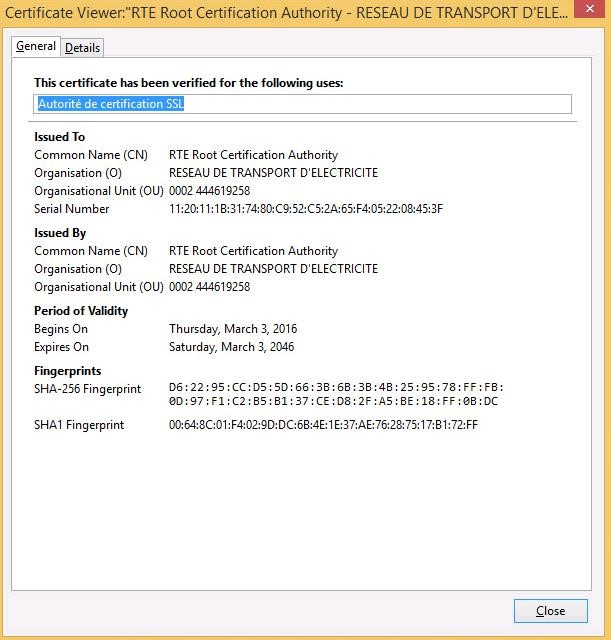
To ensure that you have downloaded the real RTE Root CA's certificate, check carefully that the "
SHA1" hash displayed is identical to the one shown below.
Digital hash of the certificate "RTE Root Certification Authority" SHA1
SHA1 00:64:8c:01:f4:02:9d:dc:6b:4e:1e:37:ae:76:28:75:17:b1:72:ff
If this is not the case: click "
Close" to go back to the precedent window and call RTE’s Hotline
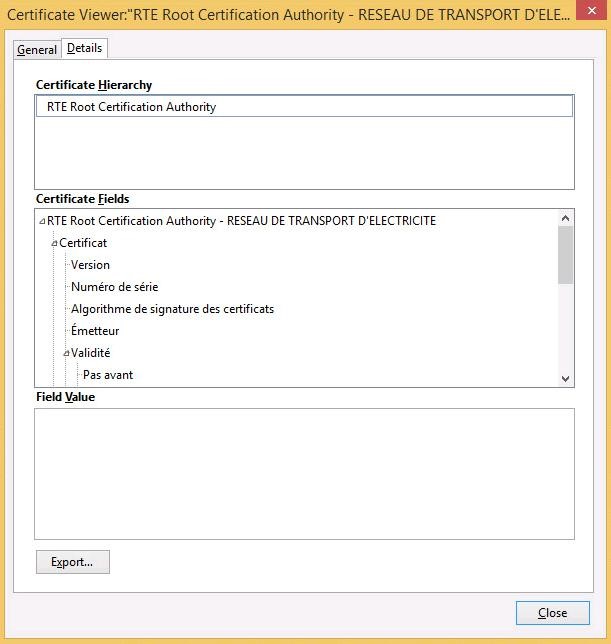
If, after verification, the hash of the certificate that you imported matches the "
SHA1" hash above, it is possible to consult the details of the certificate by clicking on the "
Details" tab:
By clicking on the "
Close" button, you return to the initial window.
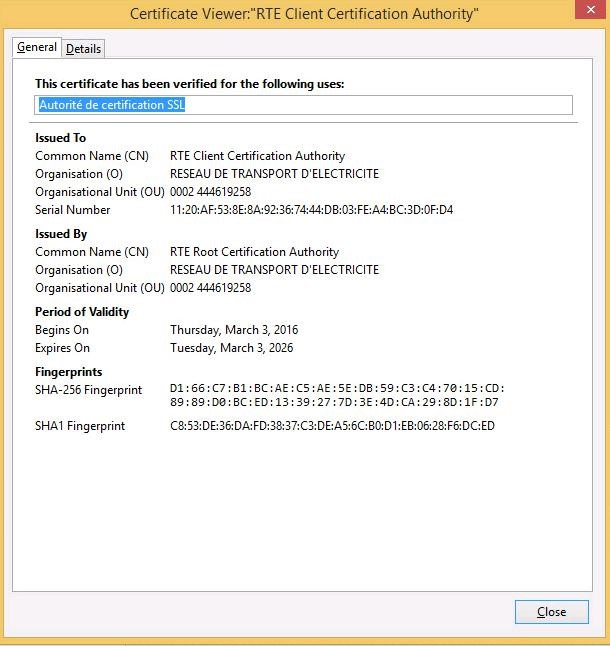
Select "
RTE Client Certification Authority" and click "
View":
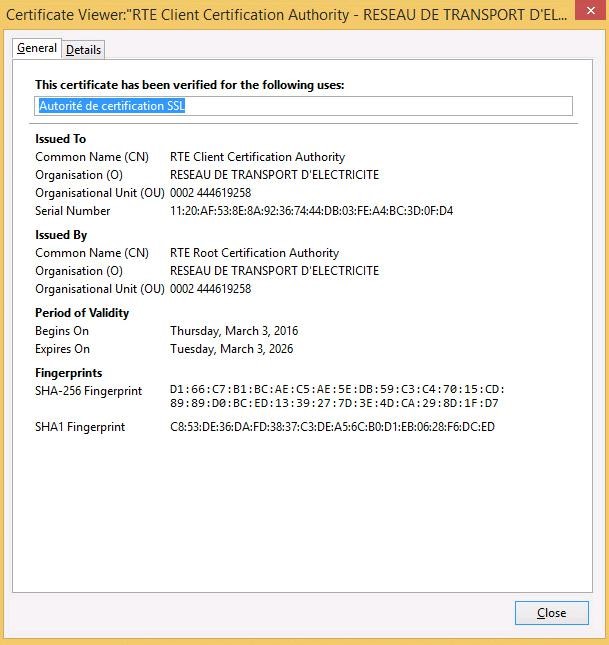
To ensure that you have downloaded the real RTE Client CA's certificate, check carefully that the "
SHA1" hash displayed is identical to the one shown below.
Digital hash of the certificate "RTE Client Certification Authority" SHA1
SHA1 C8:53:de:36:da:fd:38:37:c3:de:a5:6c:b0:d1:eb:06:28:f6:dc:ed
If this is not the case: click "
Close" to go back to the precedent window and call RTE’s Hotline
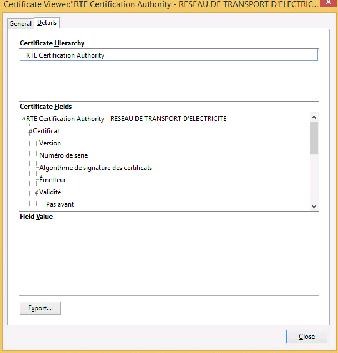
If, after verification, the hash of the certificate that you imported matches the "
SHA1" hash above, it is possible to consult the details of the certificate by clicking on the "
Details" tab:
By clicking on the "
Close" button, you return to the initial window.
Installing your personal certificate
To be able to import your certificate in Mozilla Thunderbird, you must have the file "
name_certificate.p12" downloaded with your browser when retrieving your certificate (
here for Internet Explorer,
here for Mozilla Firefox).
Start Mozilla Thunderbird, go to the menu "
Tools" on the top right of the window and click the "
Options" icon:
A window appears. Choose the "
Advanced" tab then the "
Certificates" subcategory.
Click "
View Certificates".
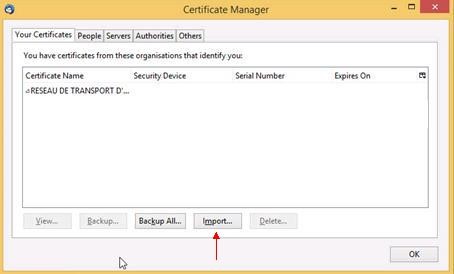
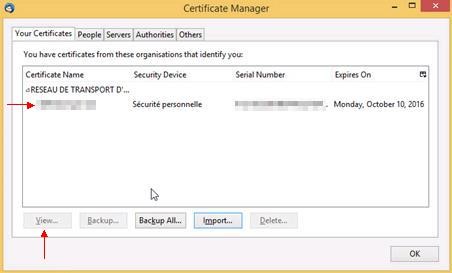
In the "
Your certificates" tab, click "
Import". In the drop-down menu "
File type" select "
PKCS12 Files":
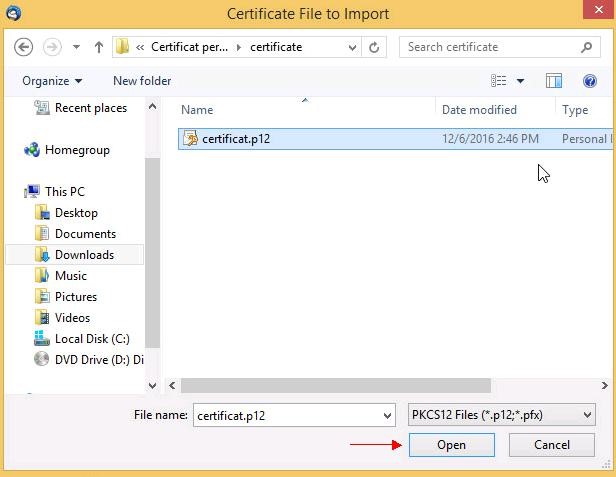
Go to the folder you saved your certificate in, select your certificate "
name_certificate.p12" and click "
Open".
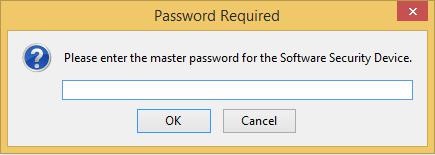
If necessary, the window below will ask you the access password to the Mozilla Thunderbird certificate store (
here to set this password):
Click "
OK".
N.B.: if there is no master password, Thunderbird will ask you to define one.
Enter the password protecting the PKCS#12 file and click "
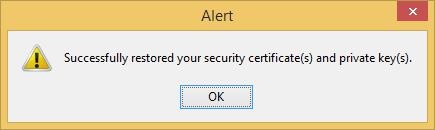
OK".
Your certificate and its associated private key have been successfully imported in Mozilla Thunderbird’s certificate store.
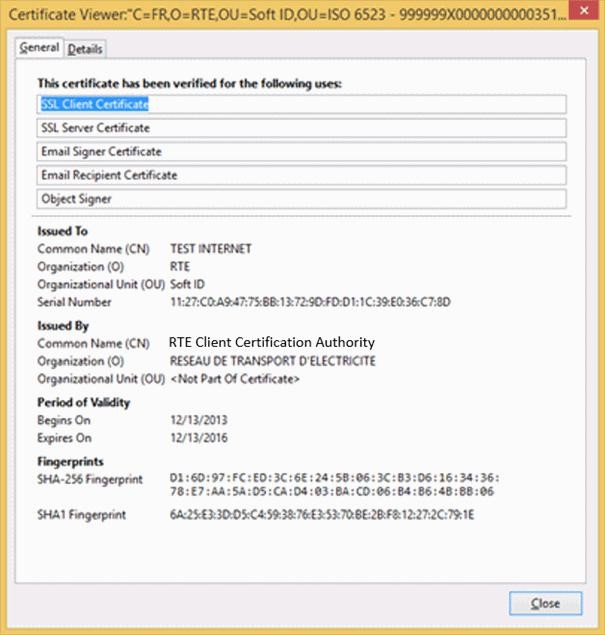
Verify this is the right certificate by clicking on "
View…".
The second tab "
Details" displays the certification hierarchy with the trust chain. This ensures that all certificates have been installed correctly, and that all the correct conditions of your certificate are met.
Email account configuration
To sign and encrypt with your certificate, it must be associated with the email account corresponding to the email address specified in the Certificate subject.
For this, start Mozilla Thunderbird, press the "
Alt" key on your keyboard, a menu bar appears at the top of the window.
Click "
Tools" then "
Account Settings".
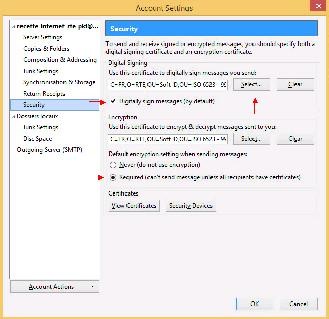
A window appears. Select the "
Security" item of the email account you use to exchange with RTE:
Click "
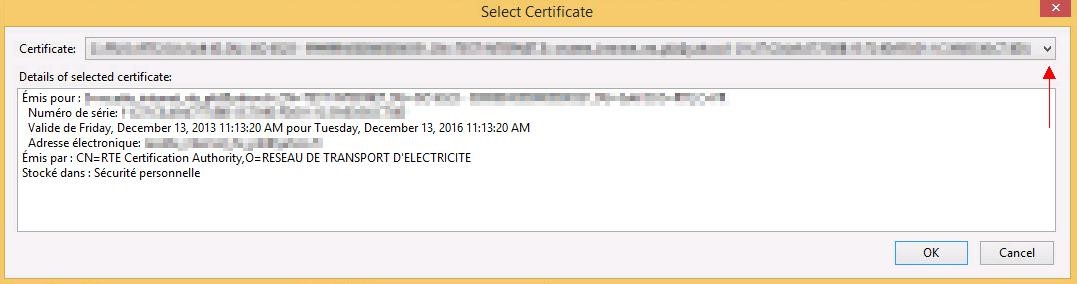
Select…" to open the following window:
Select your certificate in the drop-down list and click "
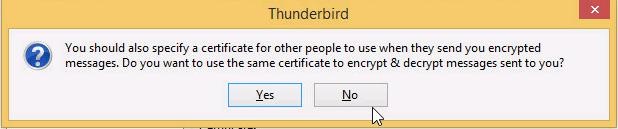
OK". The following message appears:
Click "
Yes" to automatically define the same certificate to decrypt received emails.
NOTE
Although for encryption, the text indicates that your certificate will be used to "encrypt and decrypt messages sent", it will not actually be used to decrypt messages received.
All your emails sent to RTE applications using this account will now be encrypted and signed.
Installing RTE’s application certificate
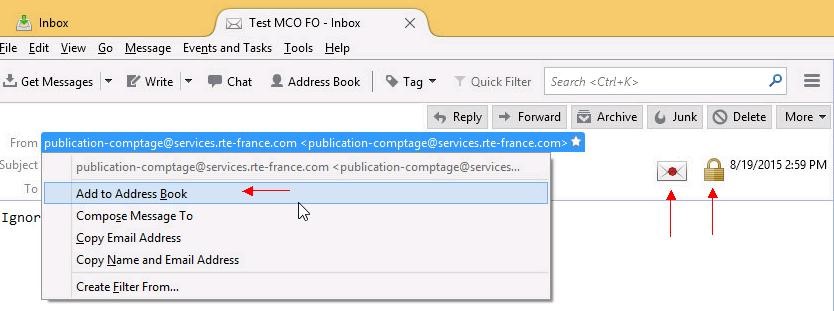
After receiving the first encrypted and signed message from an application, the application certificate installs automatically. However you can add the application’s email address to your address book by right-clicking the sender of the received email and then clicking "
Add to Address Book":
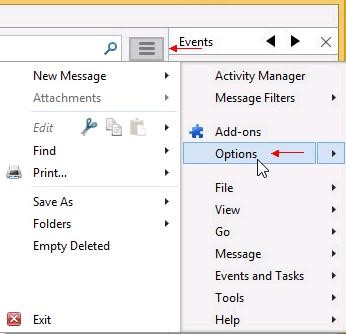
To verify that the application certificate is correctly installed, go to the menu "
Tools" ( top-right corner of the window ) and click "
Options":
A window appears. Choose the "
Advanced" tab then the "
Certificates" subcategory.
Then click "
View Certificates".
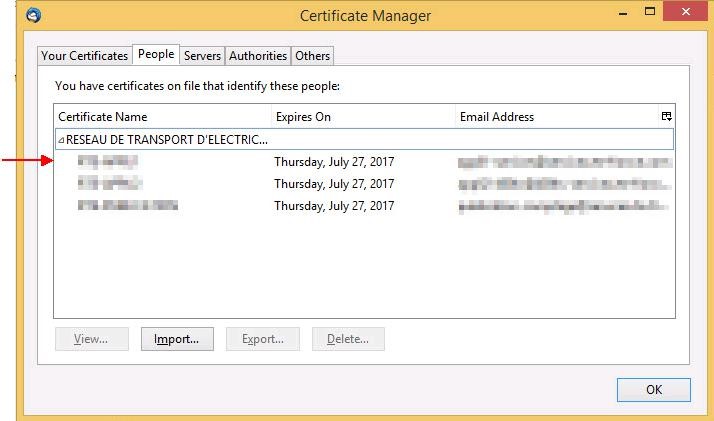
A window appears. Click the "
People" tab.
Every time an encrypted email is sent to this application, the application’s certificate will be used automatically to encrypt it.
Using the certificate: sending a signed-encrypted email
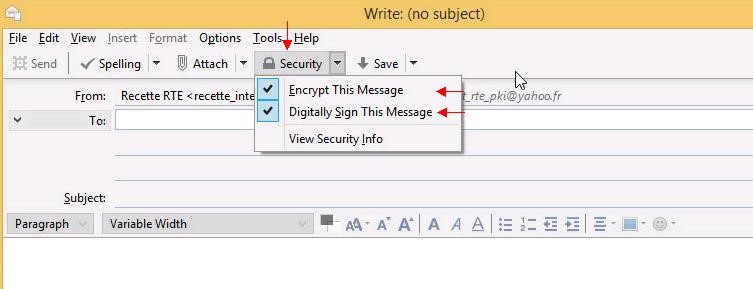
To encrypt and sign a message, first create a new message by clicking "
Write".
Click the "
Security" tab to verify the options: "
Encrypt this message" and "
Digitally sign this message". These options should be checked by default, if not: check them.
Define the master password for personal security
To protect the private key associated with your certificate it is strongly recommended to set a personal security password.
To do this, click the "
Tools" menu on the top right of the window and click on the "
Options" icon:
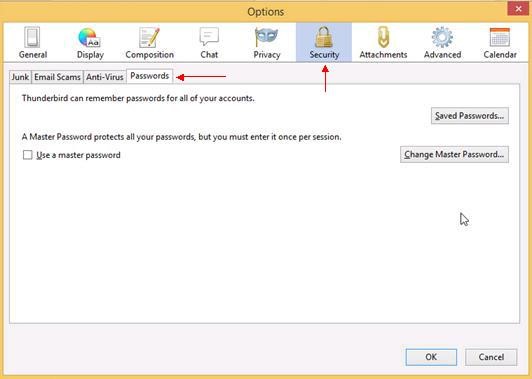
A window appears. Choose the "
Security" tab and then click on the "
Passwords" tab.
If "
Use a master password" is already checked, it means you already have a personal security password, and you have nothing to do.
Otherwise, check the "
Use a master password" case. The following window appears:
Enter your new master password in both fields and click "
OK".
Your personal security password is now defined.
You can modify your personal security password by following the same steps.